Monday, 28 April 2014

Cottage - Walls/Roof


Here is my final front wall texture, I used a combination of different plaster, dirt and paint textures to get this effect. I then added some shadows around the edges and used the Gaussian blur to make them fade out .


Here is my textured applied to the cottage, the front is coming along nicely, now going to continue doing the side walls.


Below is my finished side wall texture, here i have created many shadows and highlight to bring out the wooden pillars. I've also found a nice arch window that will mirror along the uv.


The cottage is coming together now, just need to do the wooden pillars, and the roof.


here is the finished wooden pillars texture, I've had to crop segments of the texture and rotate them, to ensure they are seamless


Here two images of my cottage so far, i'm really pleased with the outcome, textures all fit together, nothing looks out of place, all that's left to do now is the roof.


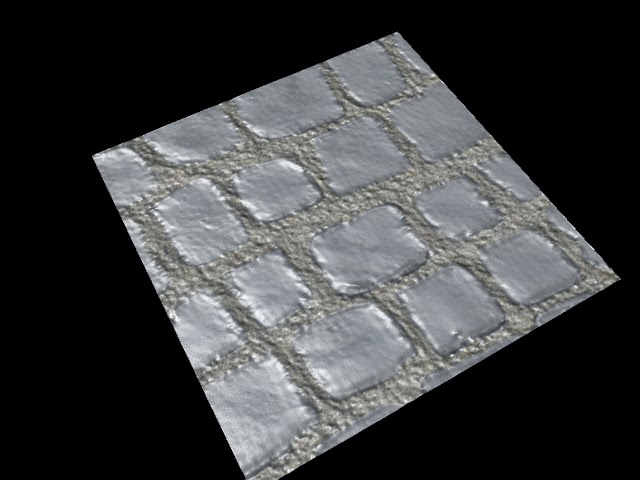
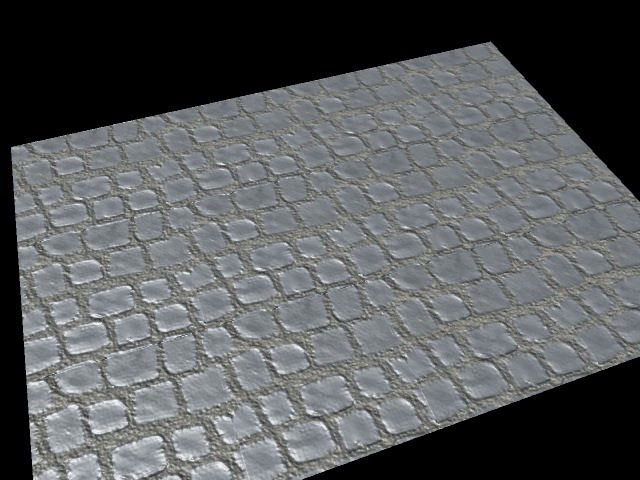
Here is the reference image of the roof tiles I have chosen.


This is my final roof texture, I added a brown base color and then a dirt texture and changed the layer setting to multiple.


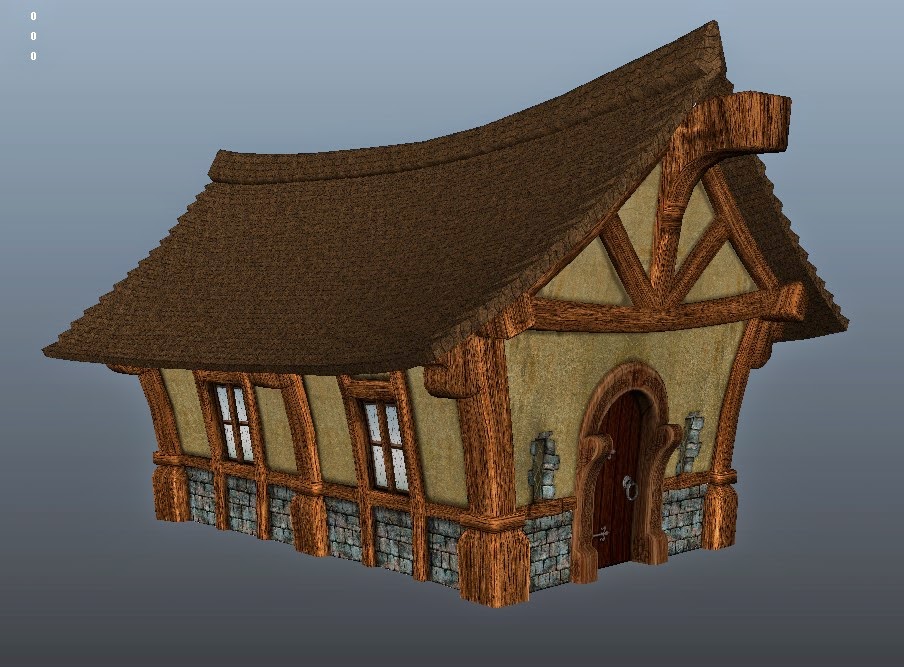
Below are a render and screenshot of my completed cottage house, im very pleased with the final product, if I we're to change anything I would add a light and spec map to the windows.


Alien Head

Here is my alien head which i painted using zbrush, i used various different colors and brushes for different effects, I had trouble trying to get the eyes to look right. I'm pleased with the overall look and style of the head, however when i came to exporting it into Maya I had various baking issues.


These were the result of my first attempt of baking the heads maps, when i applied these maps to the low-poly head in Maya, half of the face was transparent. I will need to bake this head again tweaking the baking settings to get the best possible result.


Tiled Marble


Here is a qucik tiled marble texture I created, using this reference image, I added an offset filter to the image and then clone stamped any seams through the texture. 


Here is the final tiled image, 

Corridor


Here is a texture I made use multiple other textures, I then added a dark grey overlay and added a offset filter. 


Here I have tiled the texture to ensure there are no seams. 


Using the eclipse selection, i created a black circle and used the same tool again to cut a section from the circle, I will use this oval shape to create the tread-grip pattern. Duplicating the shape and rotating them 45*then adding a dropshadow and bevel/emboss then setting the layer to multiply.


Then created striped paint across the side, ensuring the striped were tiled, set it to multiply and tats my tiled tread-floor complete, all that's left it to apply the texture to my corridor model in Maya. 


This corridor can simple be duplicated and the texture will line up seamlessly


Cottage - Door


Here is my textured door for my cottage, I've used various wood and metal textures and hand drawn my own shadows and highlights, then adding a outer glow and Gaussian blur effect. Also I added tribal/Celtic knot patterns around the door frame, and used the inner shadow effect and set the layer to multiply. I'm pleased with the first asset of the cottage, I hope to keep the same style throughout this task.


Here are my cavity and normal maps for this texture.


Cobblestone


Here is the my reference image used for this cobblestone, I then cropped the images into a 512x512 square. 


I then added a offset filter to 256 x 256, i then used the clone tool to smooth-off the rock edges. ensuring that te texture is now tilable i now can begin to create a spec and normal map for this texture.


To create a spec map for this I painted between the stones using a mid-grey paint brush on a new layer. I then set the layer to overlay to darken the gravel between the stones. i then played around with the hue and saturation and levels effects to highlight the rocks white, leaving slight grey details on the stone.


Here is the cobble stone in Maya, I applied the texture to a plane tiled it across. The normal map is a little grainy and could have done with being blued, however I am pleased with the outcome especially the pattern, I think it tiles nicely.


High Poly Crate

Here is the finished high poly krate I baked and textured for this task. To bake this I used transfer maps in Maya, making the low-poly model the target mesh and the high-poly model the source mesh, I was then able to create a normal map and AO map tweaking the setting a little. 


Using the maps I then went into Photoshop set the snapshot and AO map to multiply and textured the krate using multiple metal textures, also applying colors to edges to give it a more sci-fi look. then saved as a targa and applied it to the low poly model, applied the diffuse and normal map. I'm pleased with the texture and bakes I think the krate looks realistic.